-
Prep Time30-35 mins
-
Cook Time1 hour
-
Ready In1-2 hours
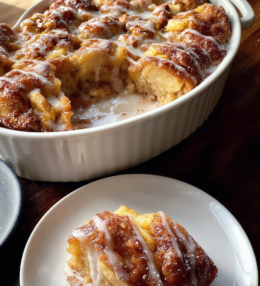
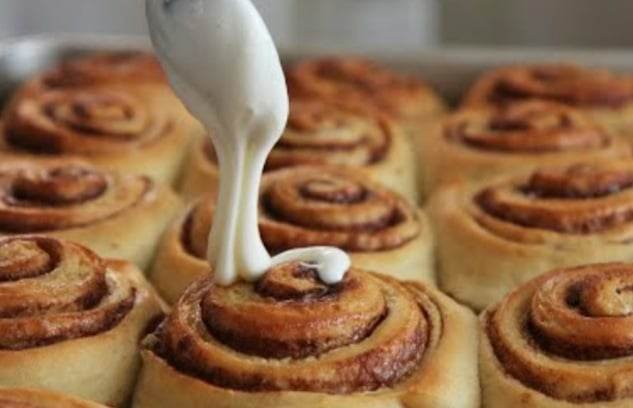
They are fluffy, but moist, with the best cream cheese icing and cinnamon sugar filling
Ingredients
Directions
In a large mixing bowl, add warm milk, melted butter, granulated white sugar, and active dry or quick rise yeast, gently whisk together and set aside for 10 minutes, or until foamy, bubbly and expanding. Whisk egg in a small bowl, then add to yeast mixture. Add vanilla and whisk all ingredients together until combined.
Gradually stir in flour and salt with a large spatula or wooden spoon until a dough begins to form – the dough will be slightly sticky. Once dough has formed in bowl, transfer to a well floured surface and use your hands to knead the dough for around the 4-5 minutes or until the dough forms into a smooth elastic round ball that is slightly sticky.
Lightly coat a large bowl with cooking oil spray or olive oil and transfer the ball of dough to the bowl, turning once to coat in the oil. Cover with a plastic wrap or dish towel and allow dough to rise for 1 hour to 1 ½ hours, or until doubled in size. In a small bowl, mix together brown sugar and cinnamon, set aside.
After dough has doubled in size, punch out air and transfer onto a lightly floured surface. Roll out dough into a 19-inch x 13–inch rectangle, brush with softened butter, then use your hands to sprinkle cinnamon sugar mixture over the buttered dough. Begin to tightly roll the dough in a log shape. When at the end, gently pinch the seam down to seal. Trim ends for even slices
Using unflavored dental floss or a serrated knife, cut dough into 12 to 15 slices. Thickness depends on your preference. Arrange the rolls in a lightly greased large baking dish. Cover with the damp warm towel and allow to rise for another 30 minutes or until doubled in size. Preheat oven to 350℉ , while rolls rising. Them remove towel, place in oven and bake for 20-25 minutes or until just slightly golden brown on top and along the edges. You want to centers to remain just a little under baked. Cool slightly before glazing.
Enjoy!!